How to Properly Attach a Cable to Your Warn Winch Drum ? | Dr Winch

Photo of author
Written by Jake Vealesco

Jake Vealesco is an offroader enthusiast for almost 6 years. He is mechanical engineer by profession and offroader by passion

If you’re the adventurous type who loves off-roading or often finds themselves in situations where a sturdy winch is a lifesaver, then you know the importance of having a reliable Warn winch drum. These winches are not just about power; they’re about safety and efficiency, too. Let’s dive into how you can ensure your winch cable is secure, so you’re ready for whatever comes your way.

Know Your Warn Winch

Warn winches[1] are designed for a variety of tasks, from heavy-duty recovery operations to lighter utility work. It’s essential to know your winch’s type, whether it’s a Heavyweight series for large vehicles, a Premium series for general 4×4 use, or a Utility series for lighter tasks.

The winch’s pulling capacity, drum size, and motor type are also crucial factors. Choosing the right cable, either synthetic rope or steel, is vital for your winch’s safe and effective operation.

Regular maintenance, including wear checks and functionality tests, will prolong your winch’s lifespan and ensure its reliability.

Each Warn winch model comes with specific safety features, such as automatic brakes and remote controls. Familiarizing yourself with these features, as well as the winch’s attachment points and specifications, will help you use and maintain your winch properly, ensuring its longevity and reliability.

Tools and Materials Needed

For a smooth and safe cable attachment process, you’ll need the following:

  • Gloves: To protect your hands from sharp cable strands and ensure a good grip.
  • Safety Glasses: To shield your eyes from debris.
  • Correct Type of Cable: Ensure it’s the right type and length for your winch model, and in good condition.
  • Small Wrench or Socket Set: For adjusting the bolts or nuts on the drum.
  • Torque Wrench: For precise tightening of the winch’s hardware.
  • Clean, Flat Workspace: To prevent accidents and facilitate a smoother installation.
  • Wire Brush: For cleaning any corrosion or debris on the drum or cable.
  • Lubricant: If recommended by your winch model, for smoother operation and reduced wear.
  • Winch Manual: For model-specific instructions and safety warnings.[2]
  • Measurement Tool: To ensure the cable is the proper length.

Preparing the Winch and Cable

Before you dive into the task of attaching your cable to the Warn winch drum, it’s crucial to ensure both the winch and cable are in tip-top shape. This preparation phase is not just about making the attachment process smoother; it’s also about ensuring safety and reliability when you’ll need your winch the most. Here’s how to get your winch and cable ready for action:

Inspecting the Winch

  • Visual Inspection: Start with a thorough visual check of the winch drum and its surrounding components. Look for any signs of damage, such as cracks, corrosion, or excessive wear. These could be indicators that your winch needs maintenance or repair before you proceed.
  • Operational Check: Ensure the winch operates smoothly. If your winch has a manual free-spool option, engage it to check if the drum turns freely without any unusual resistance or noise. This also helps in identifying any potential issues with the winch’s internal mechanisms.
  • Clean the Drum: A clean drum is key to a smooth cable attachment process. Use a clean cloth to wipe away any dirt, grit, or old lubricant from the drum’s surface. If you encounter any stubborn grime, a mild solvent or degreaser can be used, but ensure it’s compatible with your winch’s materials.[3]

Inspecting the Cable

  • Cable Condition: Carefully examine the entire length of the cable, whether it’s a synthetic rope or a steel wire. Look out for frays, cuts, kinks, or any signs of wear and tear. A damaged cable can be a serious safety hazard, so if you find any significant issues, consider replacing the cable.

  • Straightening the Cable: Lay the cable out straight and gently work through any twists or coils. For a steel cable, wearing gloves is a must to protect your hands from sharp strands. Synthetic ropes can be easier to handle but still require care to avoid creating kinks.

  • Cleaning and Lubrication (if applicable): If you’re working with a steel cable, now is a good time to clean it with a wire brush to remove rust or debris. Some winch manufacturers recommend lubricating the cable to protect against corrosion and wear. If so, apply a suitable lubricant evenly along the cable, wiping away any excess. Note that synthetic ropes typically do not require lubrication.[4]

Preparing for Attachment

  • Ensure Free Spooling: Make sure the winch is in the free spool mode, allowing you to manually pull out or wind the cable without resistance. This will make the attachment process much easier.

  • Gather Tools and Accessories: Have all necessary tools and winch accessories at hand. This might include a small wrench or socket set for securing the cable, gloves, and safety glasses for personal protection.

  • Workspace Setup: Ensure you have a clean, flat, and stable surface to work on. A clutter-free and organized workspace will help prevent accidents and make the process smoother.

How to Attach Cable to Warn Winch Drum?

Step 1: Position the Winch for Easy Access

Ensure the winch is easily accessible and stable. If it’s mounted on a vehicle, ensure the vehicle is parked on a level surface and turned off.

Step 2: Disengage the Drum

Switch the winch to the free spool mode. This allows you to manually rotate the drum, making it easier to work with during the cable attachment process.

Step 3: Thread the Cable

Take the end of the cable and begin threading it through the anchor point on the drum. Most Warn winches have a specific slot or hole designed for this purpose. Ensure you’re feeding the cable in the correct direction according to your winch’s design, usually from the bottom up, to ensure proper winding.

Step 4: Secure the Cable End

Once the cable is threaded through the anchor point, it’s time to secure it. This might involve a set screw, a clamp, or another mechanism depending on your winch model. Use the appropriate tool to tighten this connection, ensuring the cable end is firmly attached to the drum. Be cautious not to over-tighten, as this could damage the cable or the winch.

Step 5: Begin Winding the Cable

Carefully start winding the cable onto the drum by hand, keeping slight tension to ensure it lays flat and even. This initial manual winding helps prevent the cable from crossing over itself or winding too loosely.

Step 6: Engage the Winch and Wind the Cable

Once you have a few layers of cable wound by hand, engage the winch’s motor (if applicable) and use the winch control to continue winding the cable. Maintain tension on the cable as it winds to ensure it’s evenly distributed across the drum. It’s helpful to wear gloves during this process to protect your hands and provide a better grip on the cable.

Step 7: Secure the End of the Cable

When you’ve finished winding, ensure the end of the cable (often equipped with a hook or loop) is securely fastened. This might involve attaching it to a designated point on your vehicle or another secure location.

Step 8: Final Inspection

Conduct a final inspection to ensure the cable is evenly wound and securely attached. Check the attachment point again to confirm it’s tight and the cable is not at risk of slipping.

Testing and Maintaining Your Winch and Cable

After attaching the cable to your Warn winch drum, it’s crucial to test the setup to ensure everything is working as it should. Regular maintenance is also key to ensuring the longevity and safety of your winch and cable. Here’s how to go about it:

Testing the Newly Attached Cable

  • Initial Check: Before applying any significant load, do a visual inspection to ensure the cable is securely attached and evenly wound on the drum.
  • Light Load Test: Begin with a light load test to ensure the cable is properly secured and the winch is functioning correctly. Choose an anchor point that is solid but doesn’t require the winch’s maximum capacity. Engage the winch and slowly start pulling the load. Keep an eye on the cable attachment point and the cable winding onto the drum to ensure there are no issues.
  • Full Load Test: Once the light load test is successful, you can proceed to a more substantial test, closer to the winch’s maximum capacity. Always ensure that the test is conducted in a controlled environment, adhering to all safety protocols. This test will confirm that the cable is securely attached and the winch can handle the load.
  • Monitor Performance: During both tests, listen for any unusual noises and watch for smooth operation. Any irregularities could indicate a problem that needs to be addressed.

Maintaining Your Cable and Winch

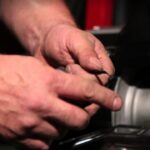
  • Regular Inspections: Frequently inspect the cable for signs of wear, fraying, or kinks, especially after heavy use. Check the winch for any loose bolts or parts and ensure the electrical connections are secure and corrosion-free.

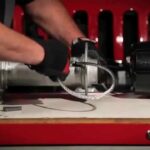
  • Cleaning: After use, especially in muddy or sandy conditions, clean your winch and cable. For steel cables, use a wire brush to remove any rust or debris, and consider applying a light coat of lubricant to protect against corrosion. Synthetic ropes can be washed with water and a mild soap, then allowed to dry completely before winding back onto the drum.

  • Lubrication: Periodically lubricate the winch’s moving parts according to the manufacturer’s recommendations. This includes the drum, gears, and any bearings. Use the specified lubricants to avoid attracting dirt or causing damage to the components.

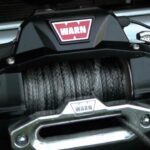
  • Proper Winding: Always wind the cable back onto the drum tightly and evenly. This prevents the cable from pinching itself and causing damage. It also ensures the winch operates smoothly and efficiently.

  • Storage: When not in use, store the winch and cable in a clean, dry place. If possible, cover the winch to protect it from dust and moisture.

  • Usage Best Practices: Avoid overloading the winch beyond its rated capacity, as this can cause excessive wear or failure. Also, try to pull in as straight a line as possible to avoid side-loading the winch.

  • Professional Servicing: If you encounter any issues beyond basic maintenance, or if your winch requires a more thorough overhaul, consider taking it to a professional. Regular professional servicing can help extend the life of your winch and ensure it’s always ready when you need it.

Troubleshooting Common Issues

  • Cable Slippage: If the cable slips under tension, inspect the anchor point closely. Tighten any bolts or screws to ensure the cable is securely fastened to the drum.
  • Uneven Winding: To prevent the cable from winding unevenly, manually guide the cable as it spools onto the drum, ensuring it lays in even layers. Also, verify that the winch is mounted level to avoid bias in the winding.
  • Cable Jamming: Should the cable jam or fail to spool smoothly, extend the cable fully and straighten it out to remove any kinks or twists. Additionally, inspect the drum for any debris, rust, or damage that might impede the cable’s movement.
  • Winch Inoperability: If the winch does not operate when activated, check all electrical connections for tightness and corrosion. Ensure the power source is reliable and the winch’s circuit breaker or fuse is intact.
  • Overheating Issues: Allow the winch to cool down if it overheats during use. Continuous operation beyond the recommended duty cycle can cause overheating. Ensure the winch is not overloaded and check for any electrical issues.
  • Strange Noises: Unusual sounds like grinding or clicking during operation may indicate internal wear or damage. Inspect the gears, bearings, and cable for signs of wear or damage and consider professional servicing if necessary.
  • Remote Control Malfunction: If the winch does not respond to the remote control, check the remote’s battery and ensure all connections are secure. For wireless remotes, confirm there’s no interference and that the remote is properly paired with the winch.

Final Thoughts

Properly attaching a cable to your Warn winch drum is crucial for safe and effective operation. Regular maintenance and careful attention during the attachment process will ensure your winch is ready when you need it. Always refer to your Warn winch manual for specific instructions and safety information.

References

  1. WARN Industries. (n.d.). https://www.warn.com/

  2. WARN Winch Manual. (n.d.). https://www.warn.com/Attachment/DownloadFile?downloadId=2372 

  3.  Independence Seaport Museum. (2020, April 16). How to properly clean a winch [Video]. YouTube. https://www.youtube.com/watch?v=6OrsUcW2woM
  4. R.N.G Performance. (2021, February 16). How to care for your Winch Cable [Video]. YouTube. https://www.youtube.com/watch?v=ozJRFb2U9d0

Leave a Comment